In this tutorial, I am going to show you how I make Half Square Triangles (HSTs).
When cutting fabric to make HSTs, I always cut squares of fabric half an inch bigger than the finished HSTs will be. So if I need a 3″ HST, I will cut 3.5″ squares to start with – this is just something to keep in mind when cutting squares to make other sizes of HSTs.
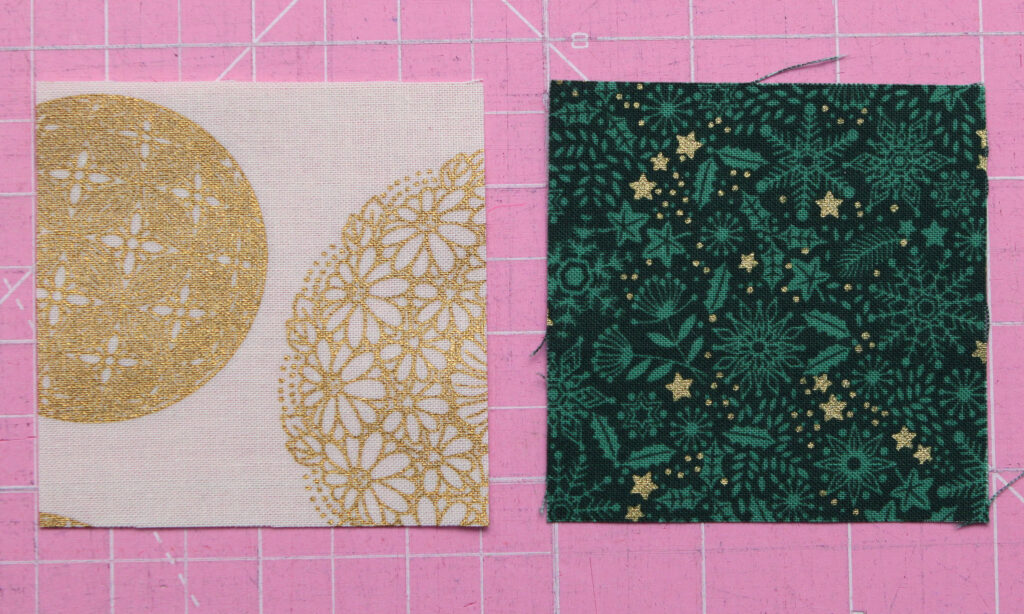
For the Christmas Tree Quilted Panel, you need 2.5″ HSTs, so you need to cut 3″ squares. To start making the HST, take one 3″ cream square and one 3″ green square:
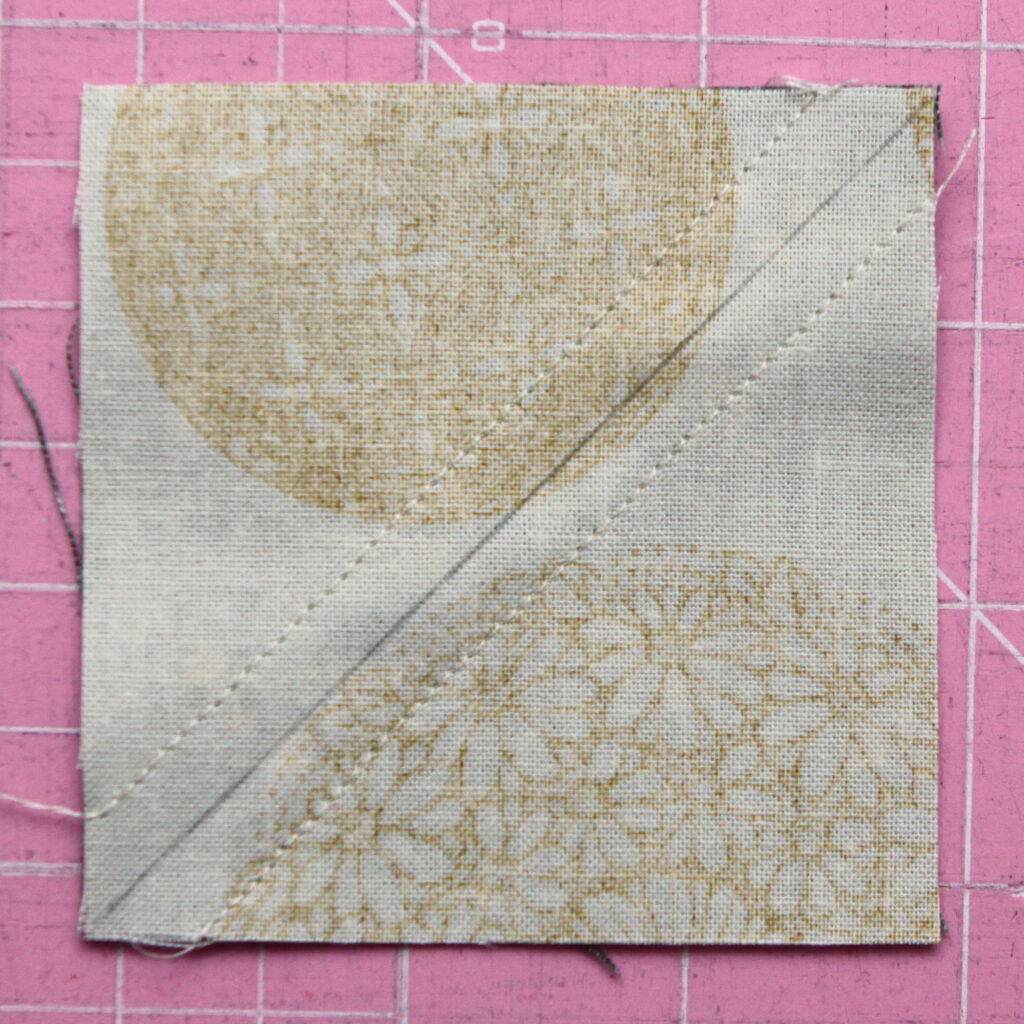
Turn the cream square over so that the wrong side is facing and draw a line diagonally across the back. This line will not be visible once the HST is made so you can use a pencil and ruler to draw it:
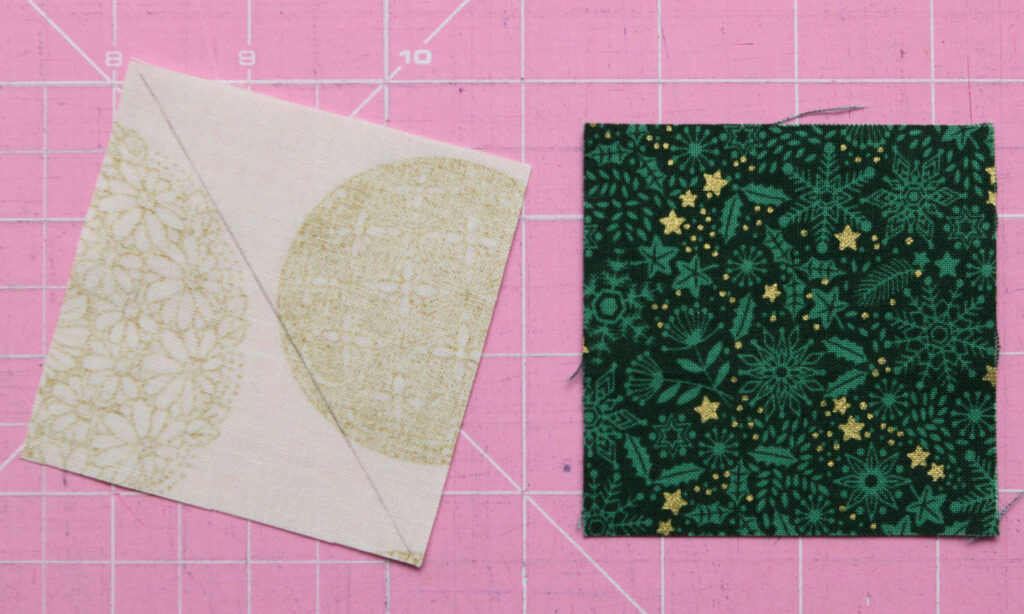
Place the cream square on top of your green square with right sides togeher:
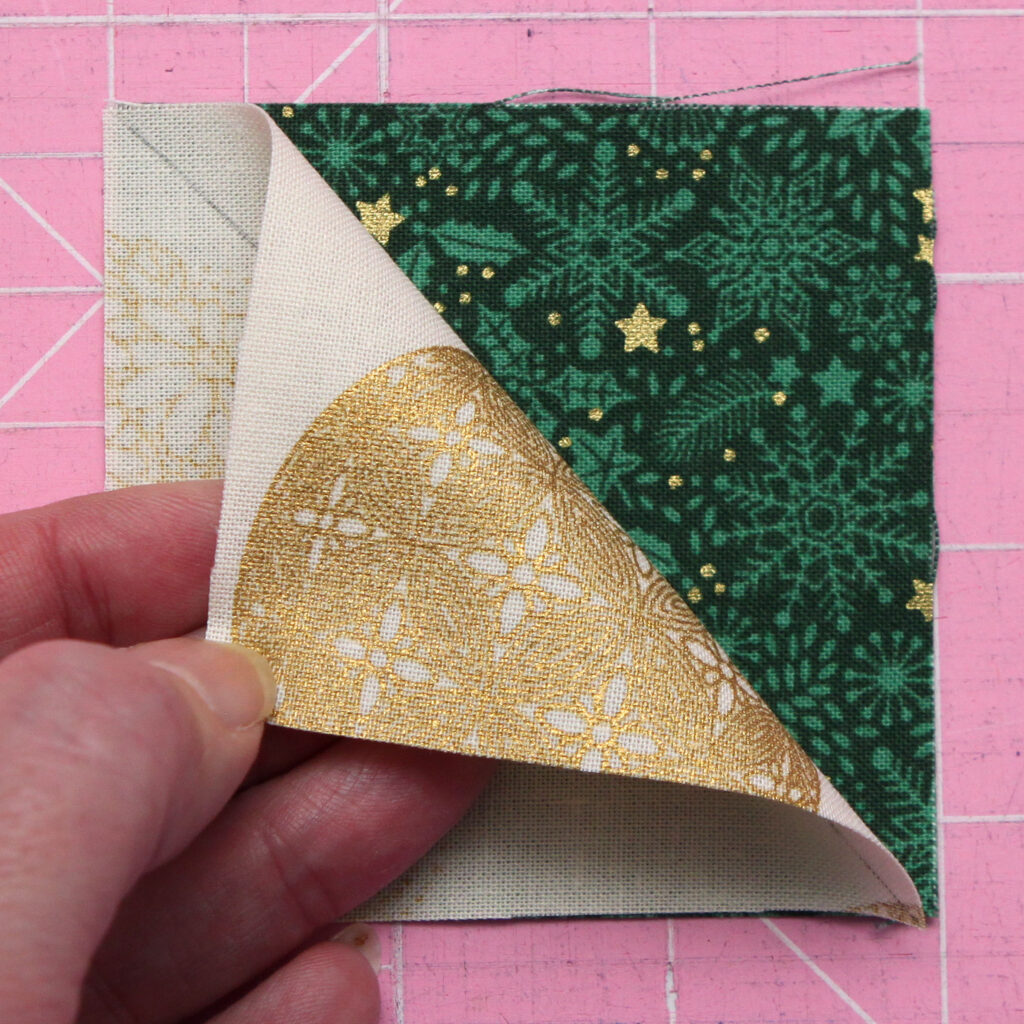
Sew two lines, one along either side of that diagonal drawn line – each line should be a quarter inch away from the original drawn line:
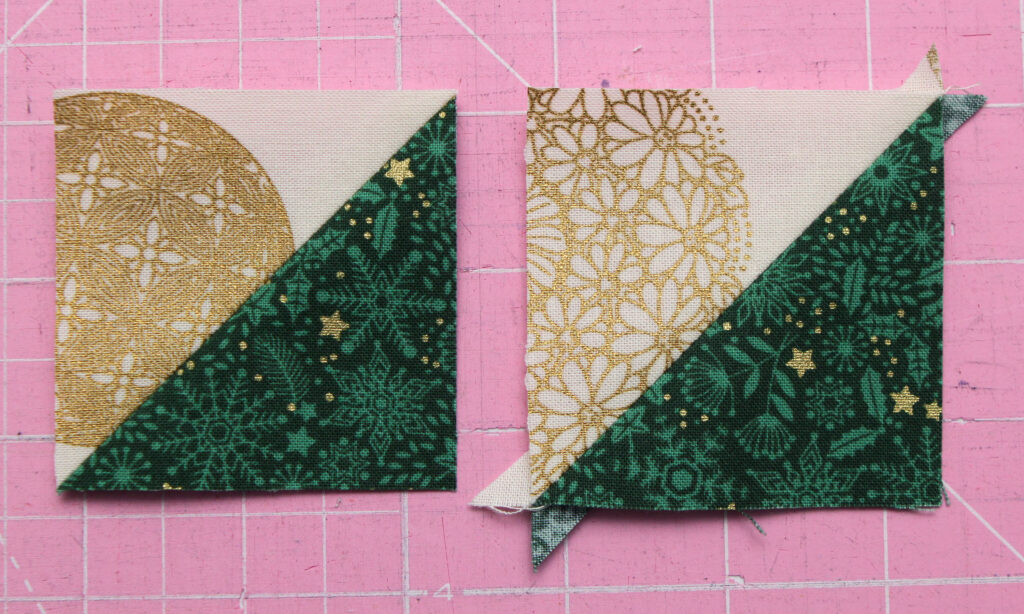
Once the lines have been sewn, cut along the drawn line using a rotary cutter and a ruler:
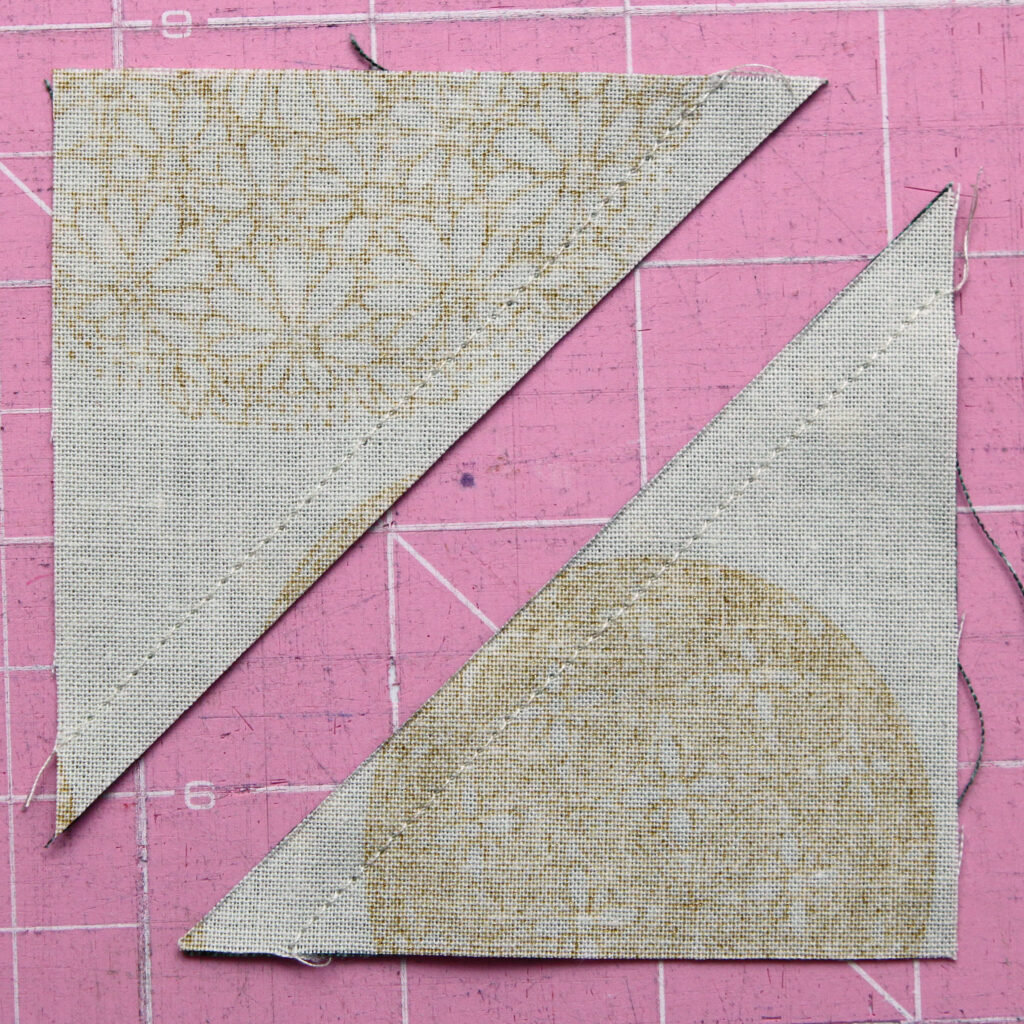
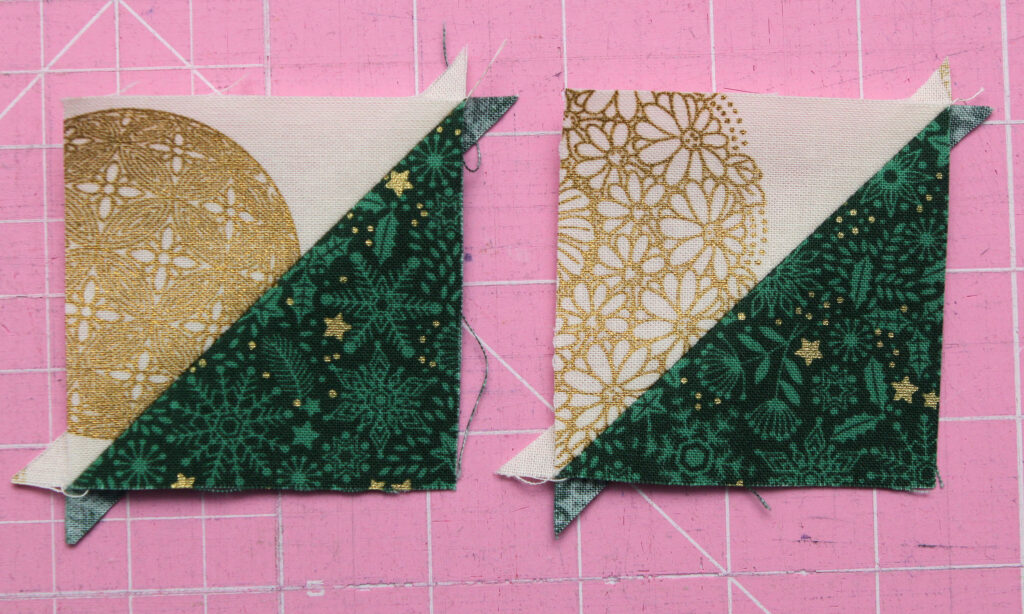
Open the two HSTs and press the seams open:
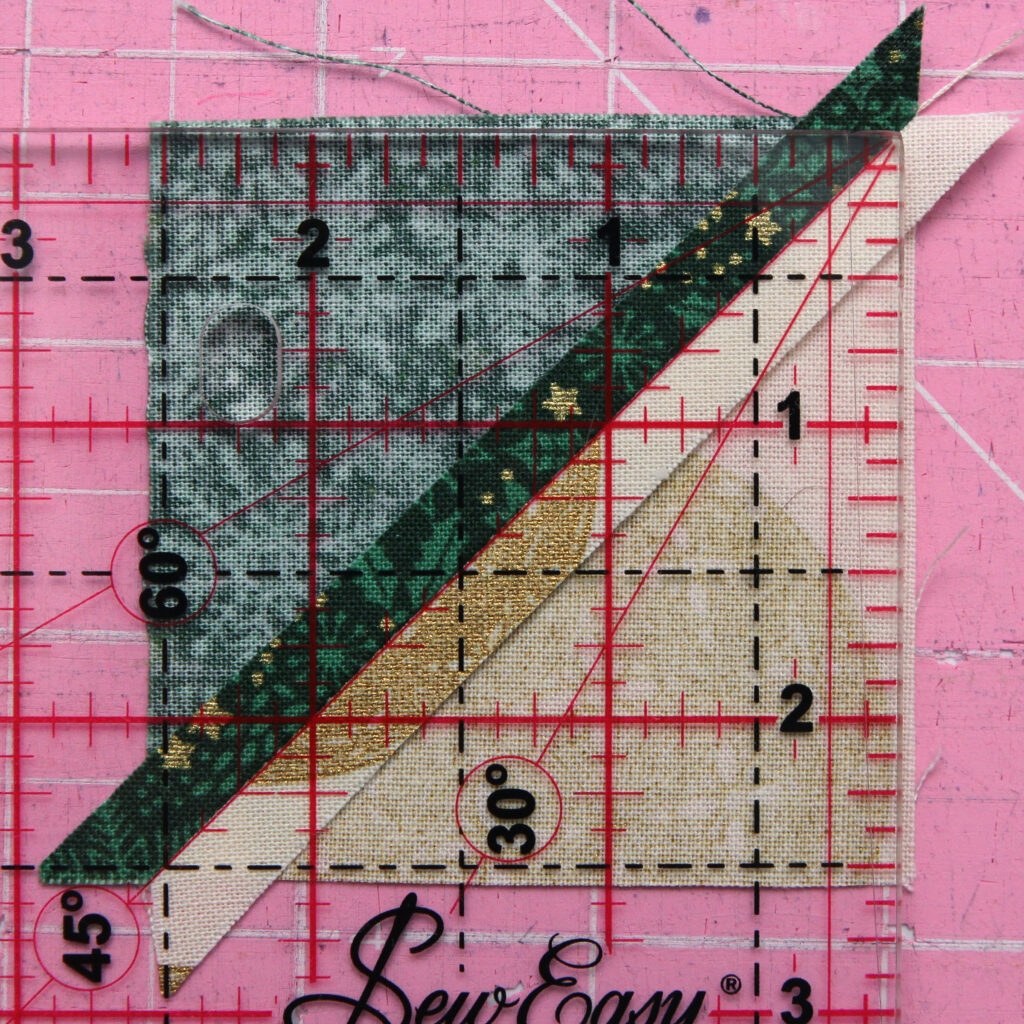
You now have two HSTs that need trimmed to the correct size (2.5″). I will be using a 4.5″ square ruler to trim my HSTs. You can see on the image below that there is a 45 degree line that runs diagonally through the ruler:
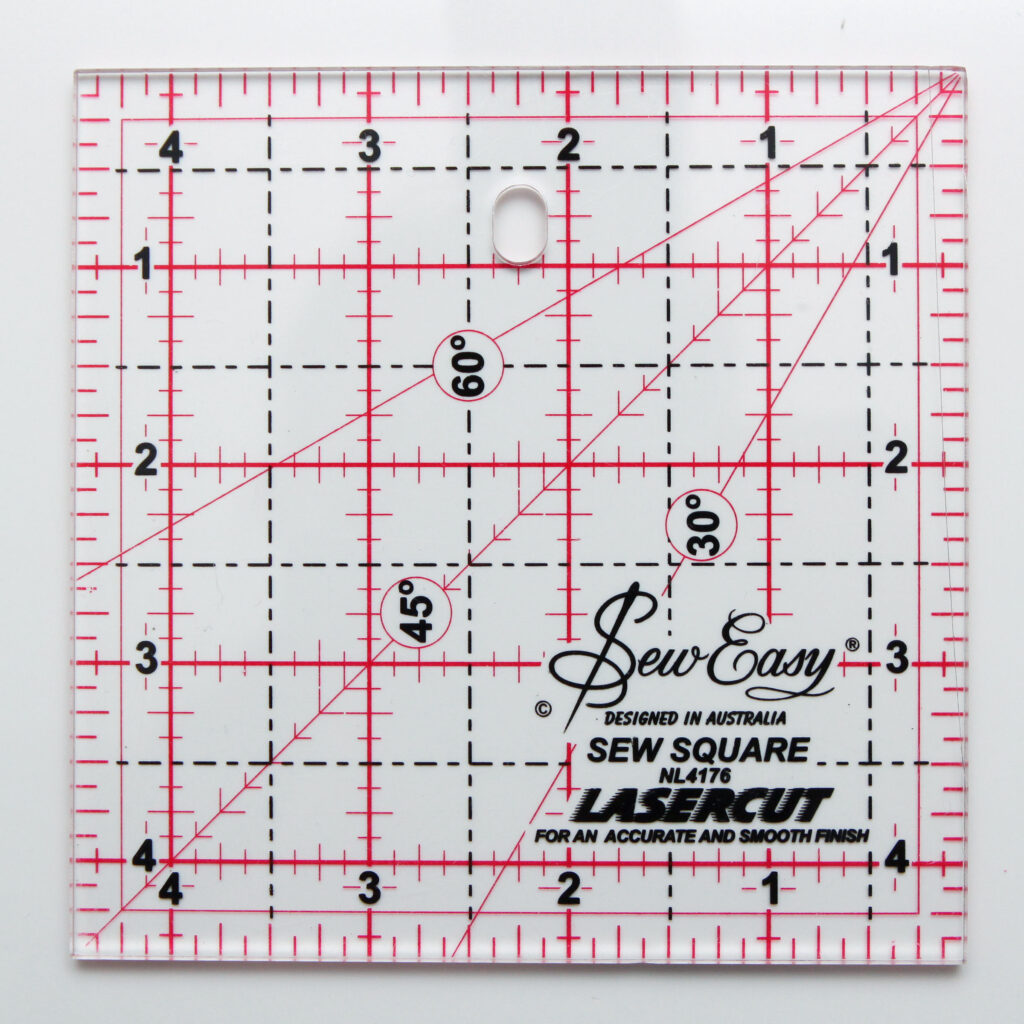
Turn one HST over so that the wrong side is facing and place your ruler over your HST as shown. You want the 2.5″ markings on the ruler to be inside the left hand and lower edges of your HST and the 45 degree line will be running along the seam (where the cream and green triangles are sewn together):
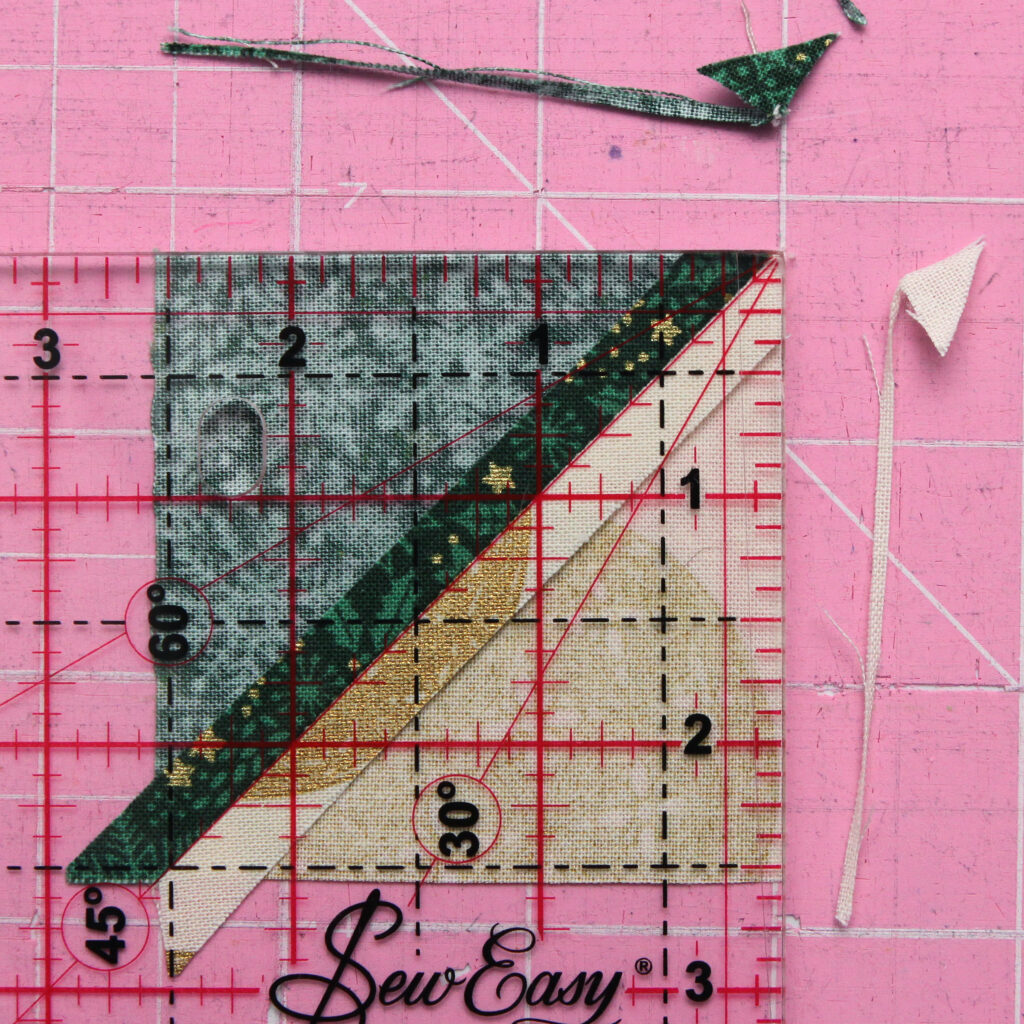
Once the ruler is in position, hold it in place and trim the fabric along the right hand side and the top edge of the HST:
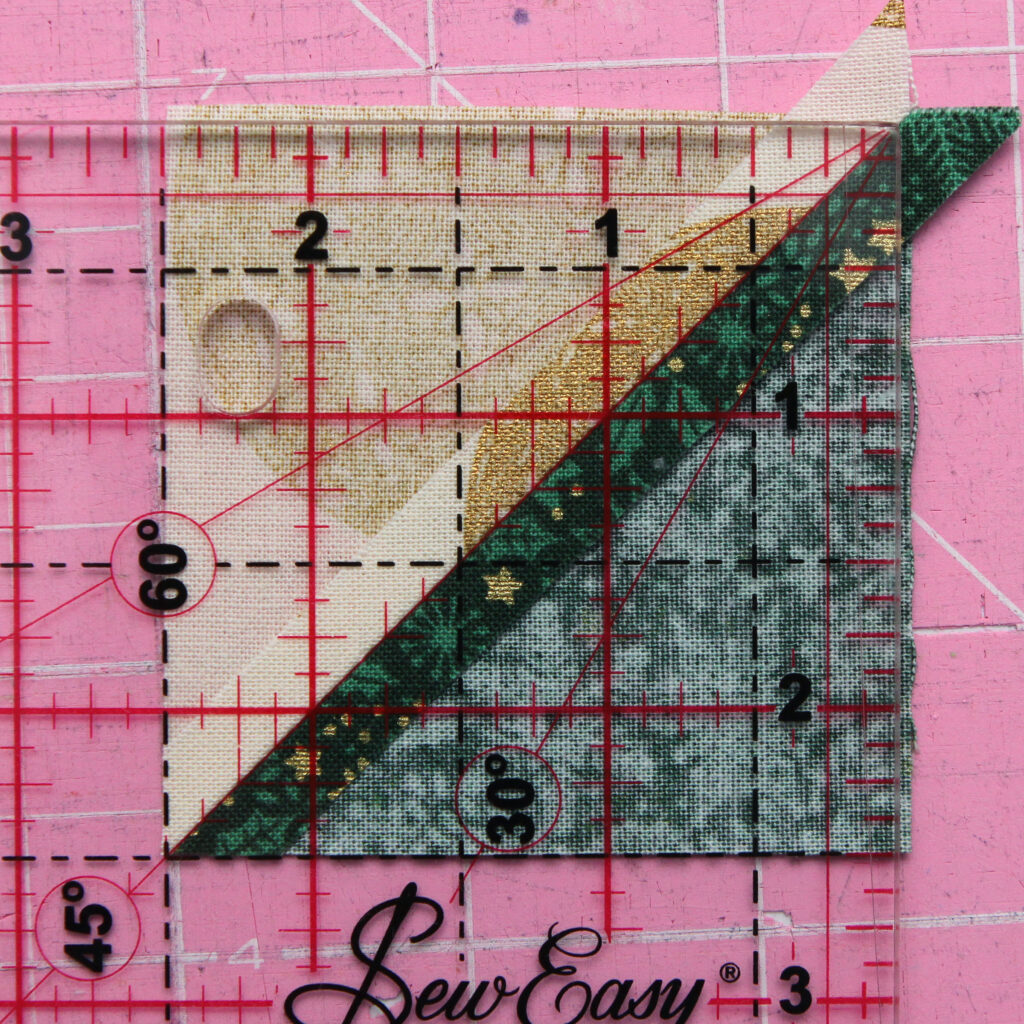
Once the first two sides have been trimmed, turn your block 180 degress so that the cut sides are now to the left hand side and along the bottom, then place the ruler on top of your HST as shown . This time, the 2.5″ markings on the ruler will be running along the left hand and lower edges of your HST and the 45 degree line will be running along the seam (where the cream and green triangles are sewn together):
Once the ruler is in position, hold in place and trim those last two edges:
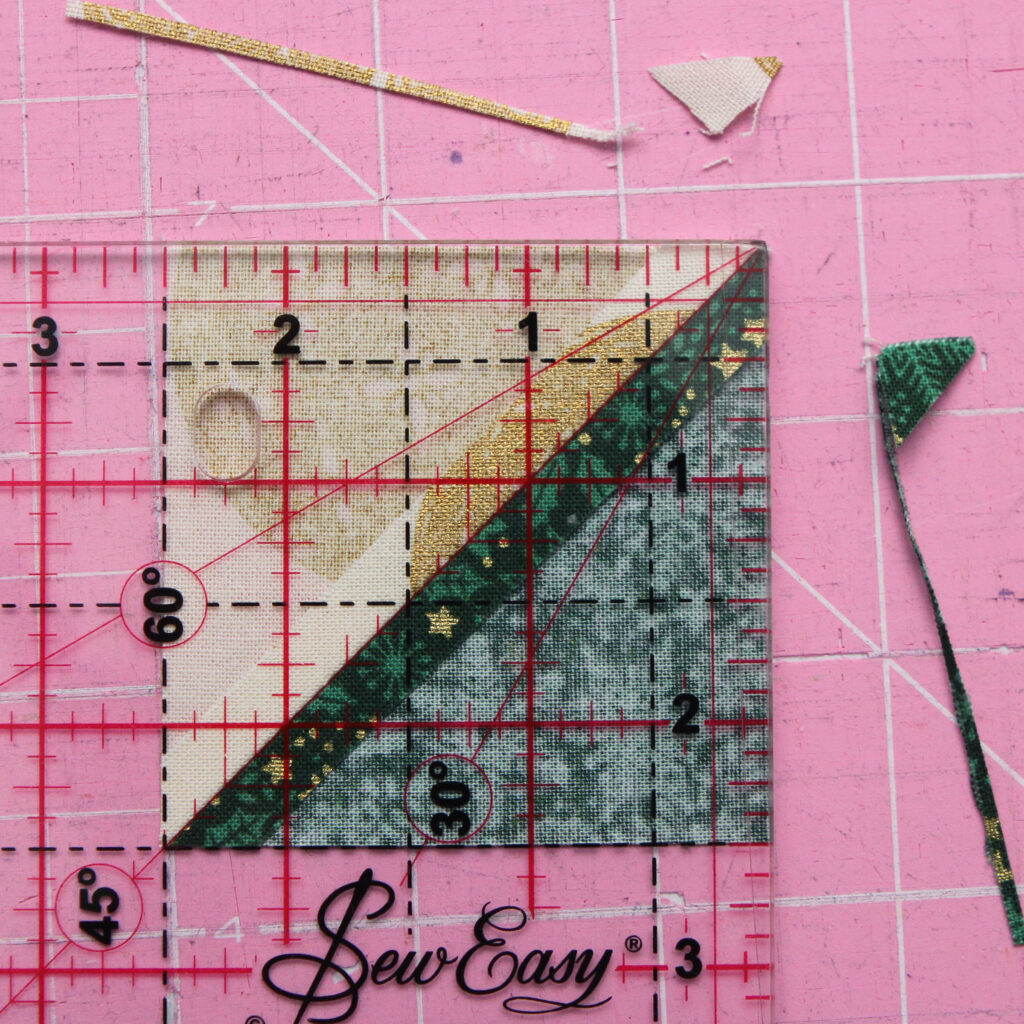
You now have a HST trimmed to 2.5″ square. The seam that joins your two colours runs diagonally through the centre of the square:

This is the trimmed HST next to the untrimmed HST:
Carry on making HSTs in this way until you have the required number of each colour needed for your pattern.