
The Fabric Requirements for this Christmas Tree can be downloaded for free from my Payhip Store. You may be able to rummage through your stash to find fabrics to make this tree block – that is why I have given very specific sizes for each of the colours used in my fabric requirements rather than telling you to use fat quarters / half metres.
This tutorial will show you how to make a cushion with your finished Christmas Tree, but if you prefer, you could turn it into something else – a mini wall hanging, a stocking or a bag to store your Christmas crafts.
I have used Christmas themed fabrics in this photo tutorial to show you how to sew your pieces of fabric together to make your Christmas Tree block. There are enough details on this tutorial to help you make your tree block, but you can also download a Christmas Tree Cushion Pattern if you would like to have a printed copy to keep. The pattern is five pages long and contains one colour image, so it won’t use a lot of printer ink. There are no extra details in this pattern.
Let’s get started on this QAL!
Abbreviations
- RS/WS – Right Side/Wrong Side
- WoF – Width of Fabric
- All seams are sewn at ¼” unless otherwise stated
For this photo tutorial, I will be using various Christmas themed fabrics – these fabrics were all from my stash and were leftovers from other quilting projects.
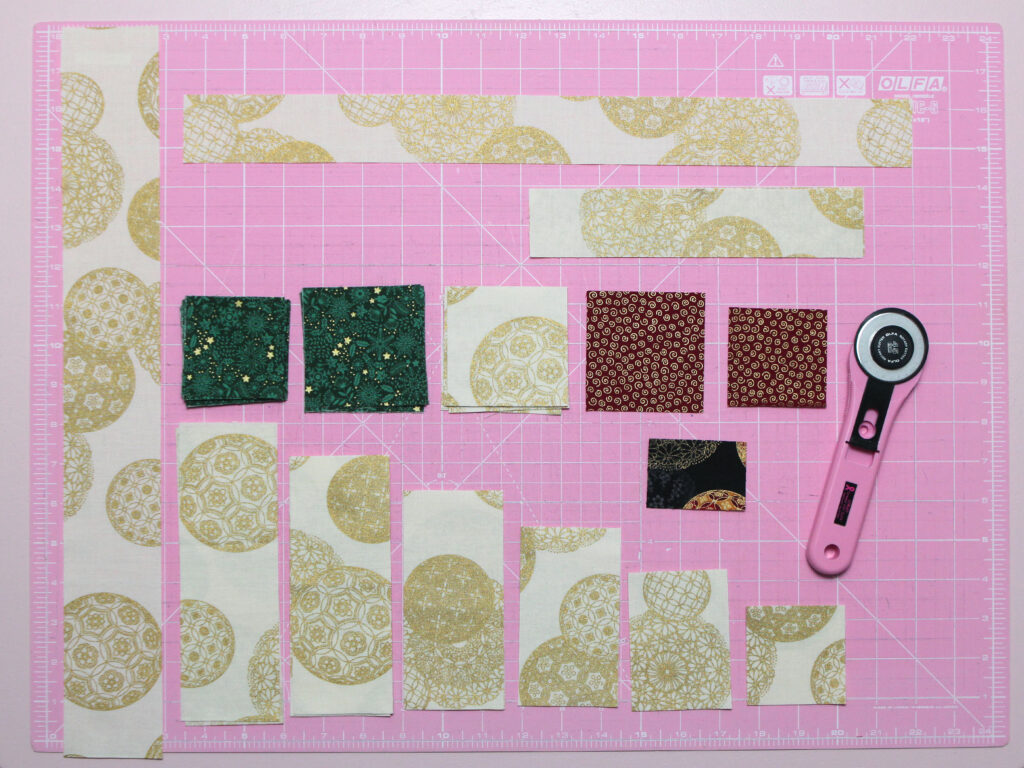
I have listed details of all the cutting instructions below for each of the fabrics and listed the colour of each in brackets. You do not have to stick to the colours that I used – feel free to experiment with different colourways to match your decor.
Cutting Instructions for Christmas Tree Fabrics
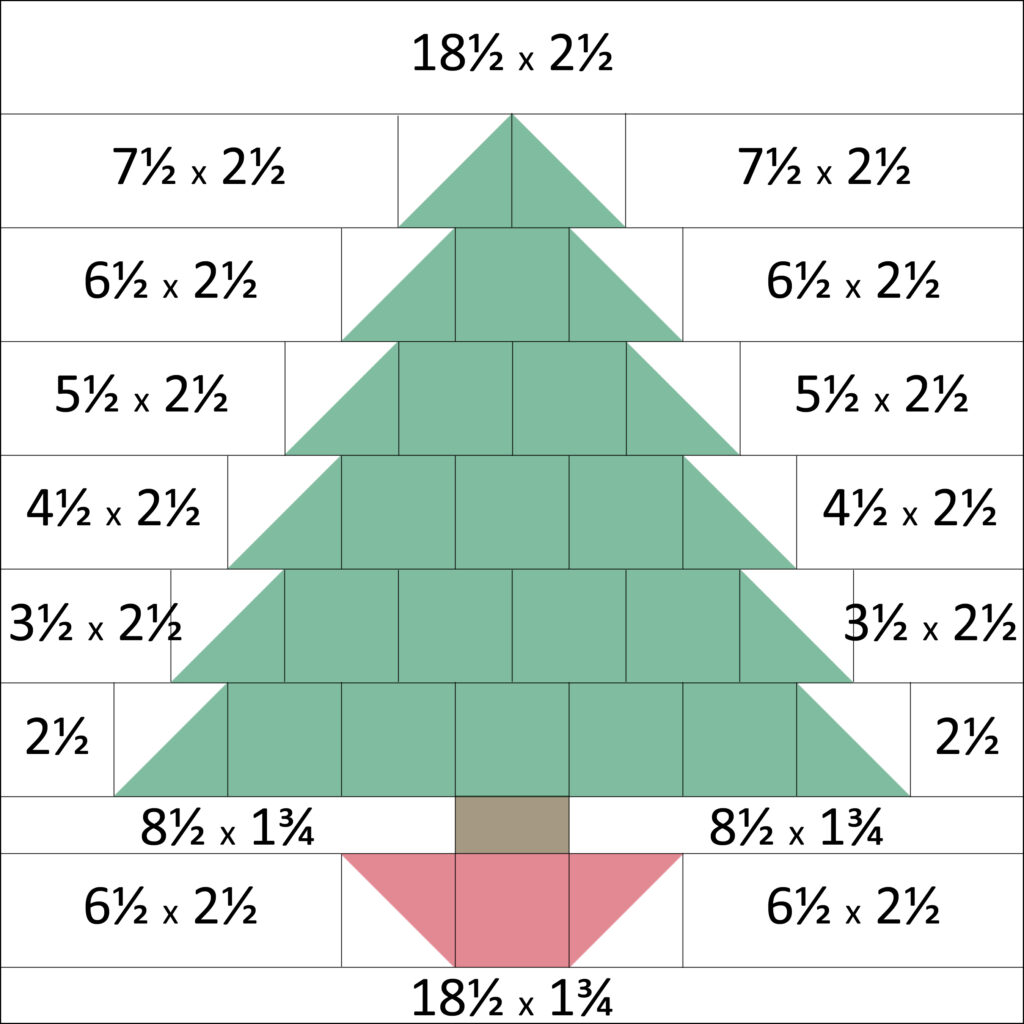
From Background Fabric (cream) cut 3 x 2½“ strips. Cut these strips into the following lengths:
- 1 of 18½” x 2½”
- 2 of 7½” x 2½”
- 4 of 6½” x 2½”
- 2 of 5½” x 2½”
- 2 of 4½” x 2½”
- 2 of 3½” x 2½”
- 2 of 2½” x 2½”
Cut remaining Background Fabric (cream) in half – 2 pieces 3½“ x 21”.
From the 1st piece cut the following lengths:
- 1 of 18½” x 1¾”
- 2 of 8½” x 1¾”
From the 2nd piece cut:
- 7 x 3“ squares
From Christmas Tree Fabric (green) cut:
- 6 x 3” squares
- 15 x 2½“ squares
From Tree Base Fabric (red) cut:
- 1 x 3” squares
- 1 x 2½“ squares
From Tree Trunk Fabric (brown) cut:
- 1 of 1¾“ x 2½“
From Binding Fabric cut:
- 3 x 2½“ WoF strips
- Join 2 of these strips to make one long piece of binding 2½“ x 82”
- The other piece will be used to bind cushion backs
After cutting all my fabrics, I laid out all my little bundles on my cutting board (binding not shown):
Making the Half Square Triangles:
Take a look at this Half Square Triangle Tutorial which shows you how to HSTs if you are unsure how to make them.
Make 14 HSTs, pressing seams open:
- Make 12 HSTs using six of your 3” cream and six 3” green squares
- Trim these HSTs to 2½” square
- Make 2 HSTs using one of your 3” cream and one 3” red squares
- Trim this HST to 2½” square
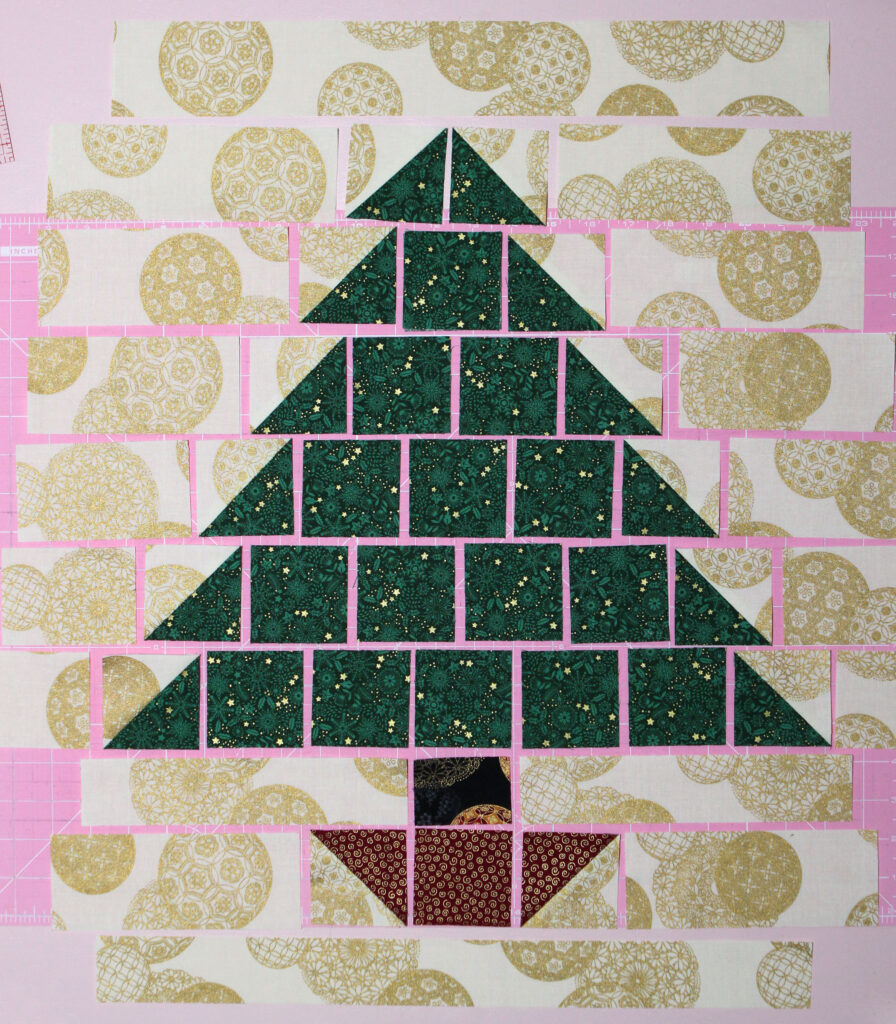
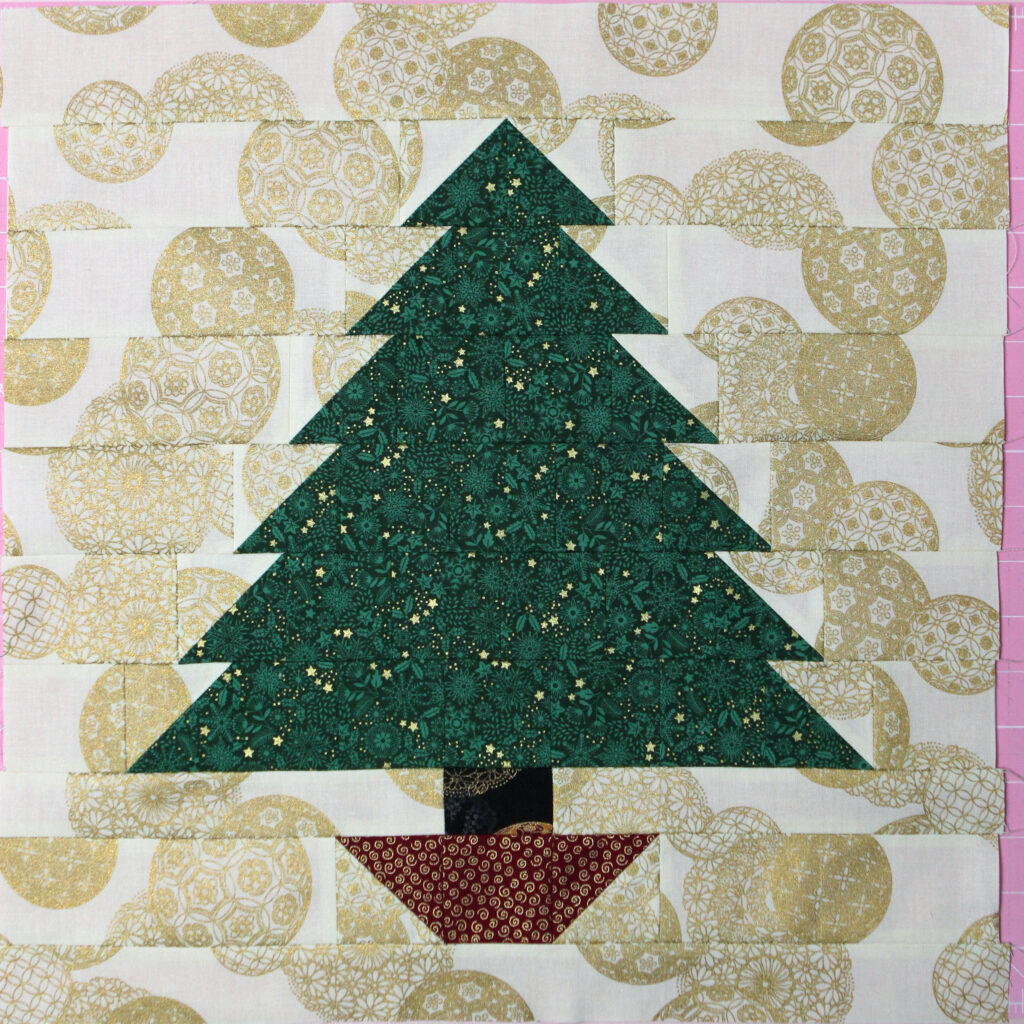
Laying Out the Fabrics into a Christmas Tree Design
Lay out your fabric pieces as shown below:
Once laid out, my Christmas Tree fabrics look like this:
Joining the Fabrics to make Rows:
Once you have arranged all the fabrics to create your Christmas Tree design you should:
- piece all the rows together and press the seams open
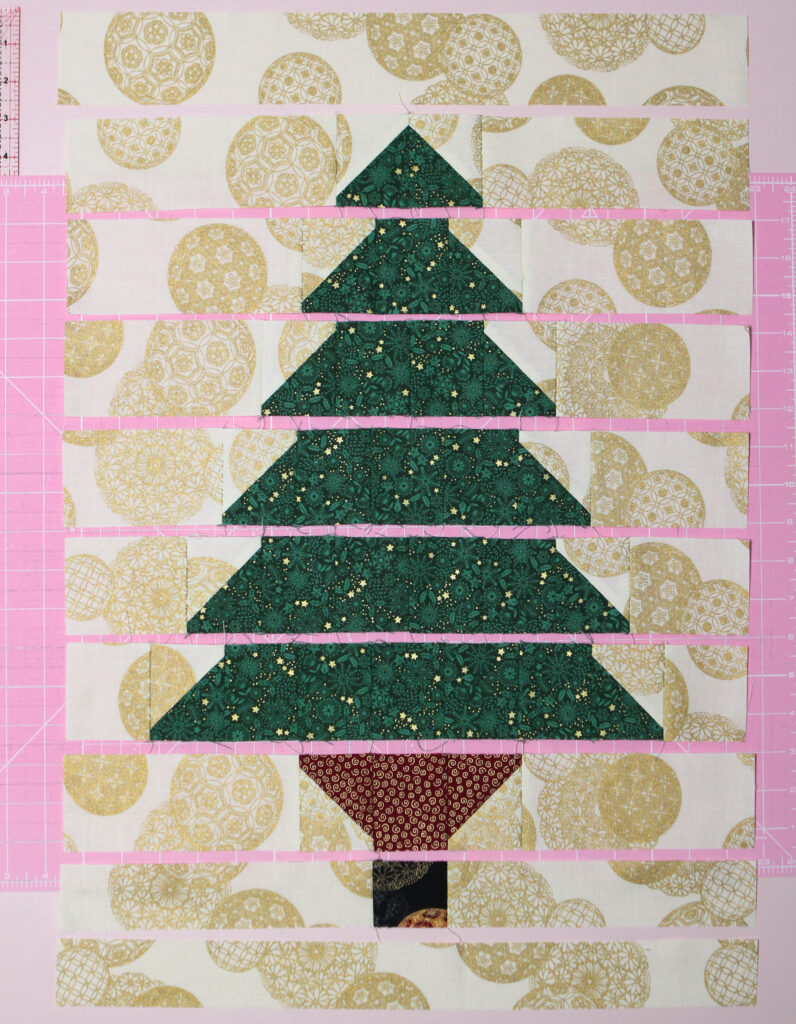
Joining the Rows to make the Christmas Tree Block
Once the rows are pieced, you need to start joining these rows to create your Christmas Tree as follows:
- the bottom four rows can be sewn together in the usual way – with fabrics facing RS together and taking care to match your seams. I place a pin diagonally across my seams to hold my two rows in place while I sew them together
- again press seams open
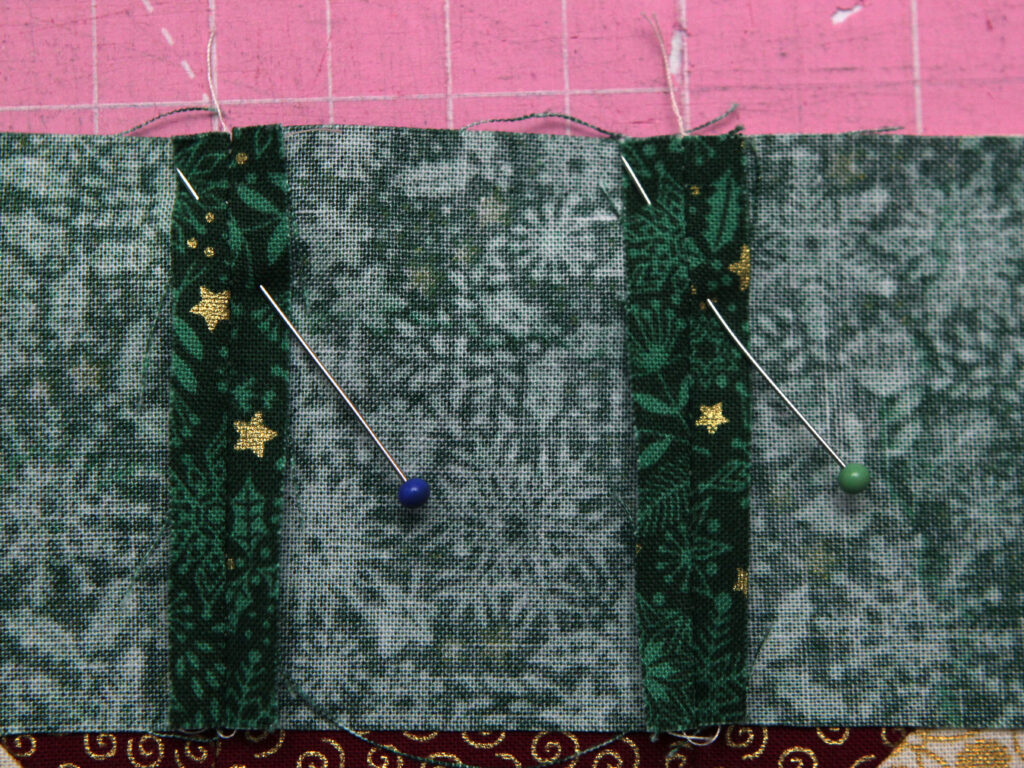
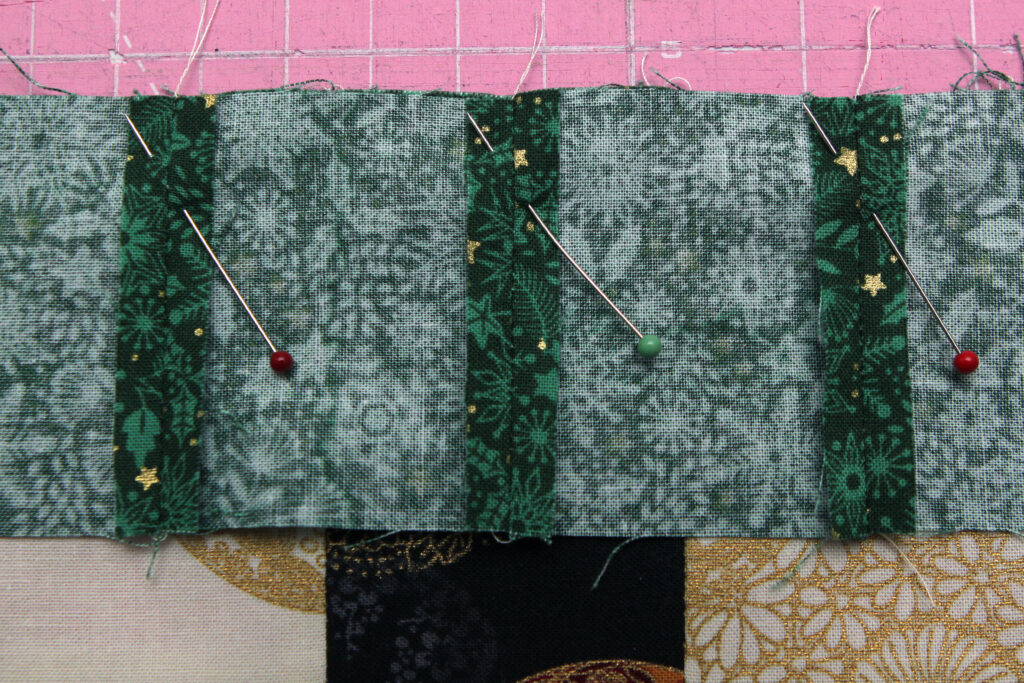
When adding on the rows with tree branches, you need to match seams to the centre of the square below (counting up from the bottom, the image below shows Rows 4 & 5). Here is how to match these rows correctly:
- on Row 4 (the bottom row with green tree fabric), mark the centre of each square – I drew a chalk line in the centre of these squares when working with them, but I have added thicker white lines in the picture below to make them easier to see
- flip Row 5 on top of Row 4 (with RS together), matching the seams Row 5 to the marked lines on Row 4 and secure in place with pins before sewing
- press seams open
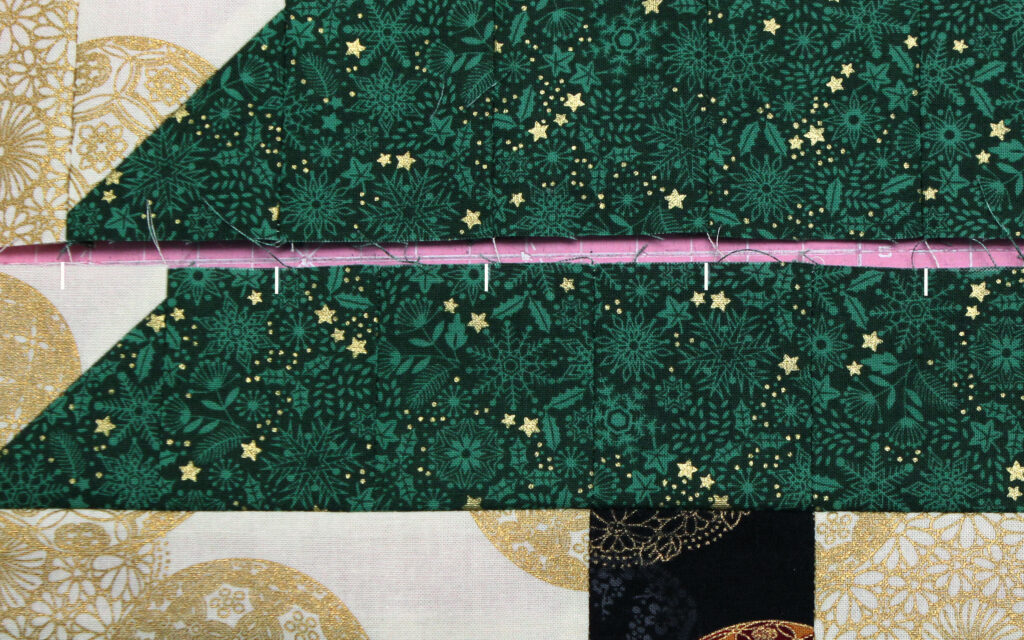
Once pressed, you can see that these seams within the tree do not match up:
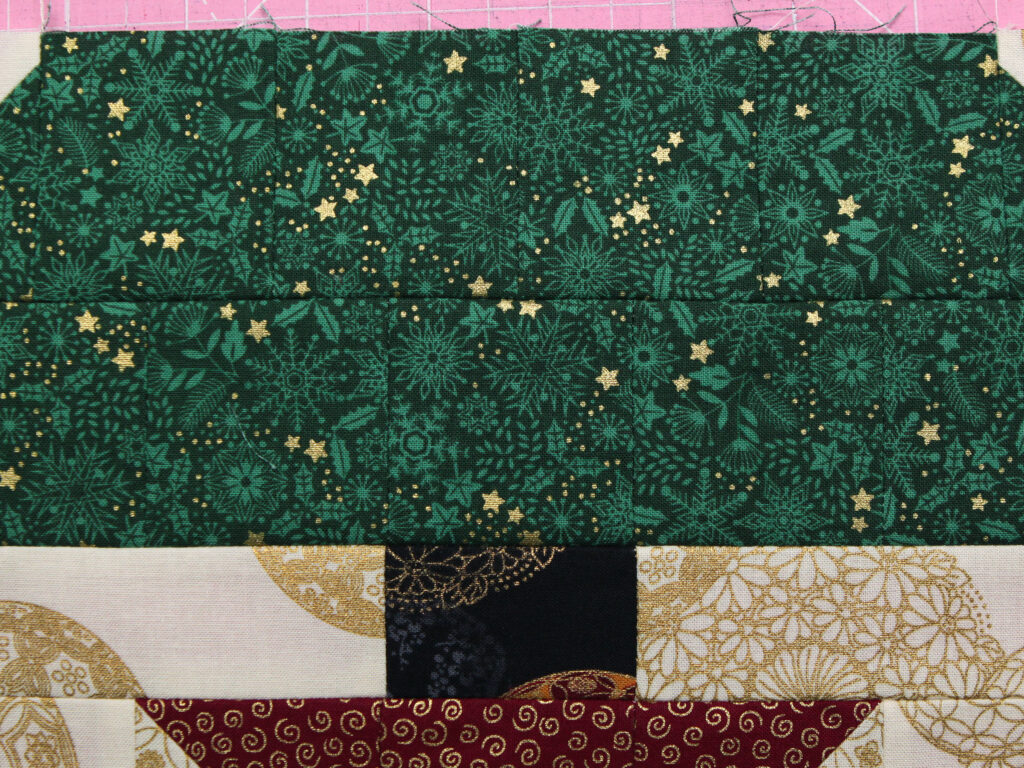
It is easier to see on the back of this piece that the seams do not match:
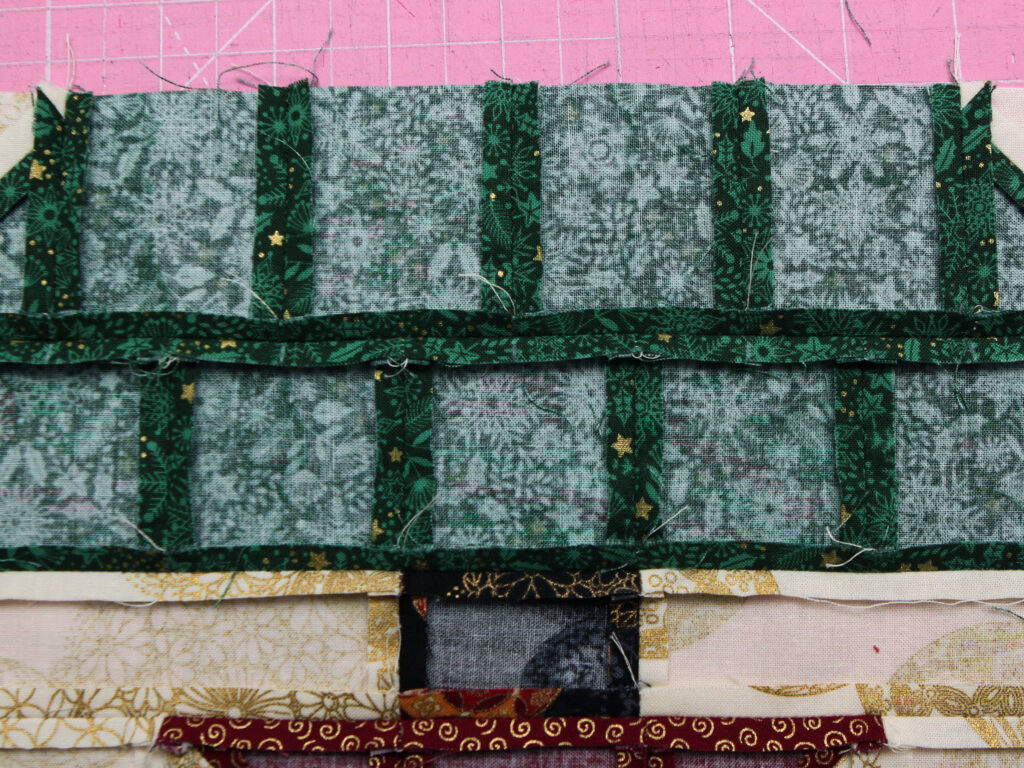
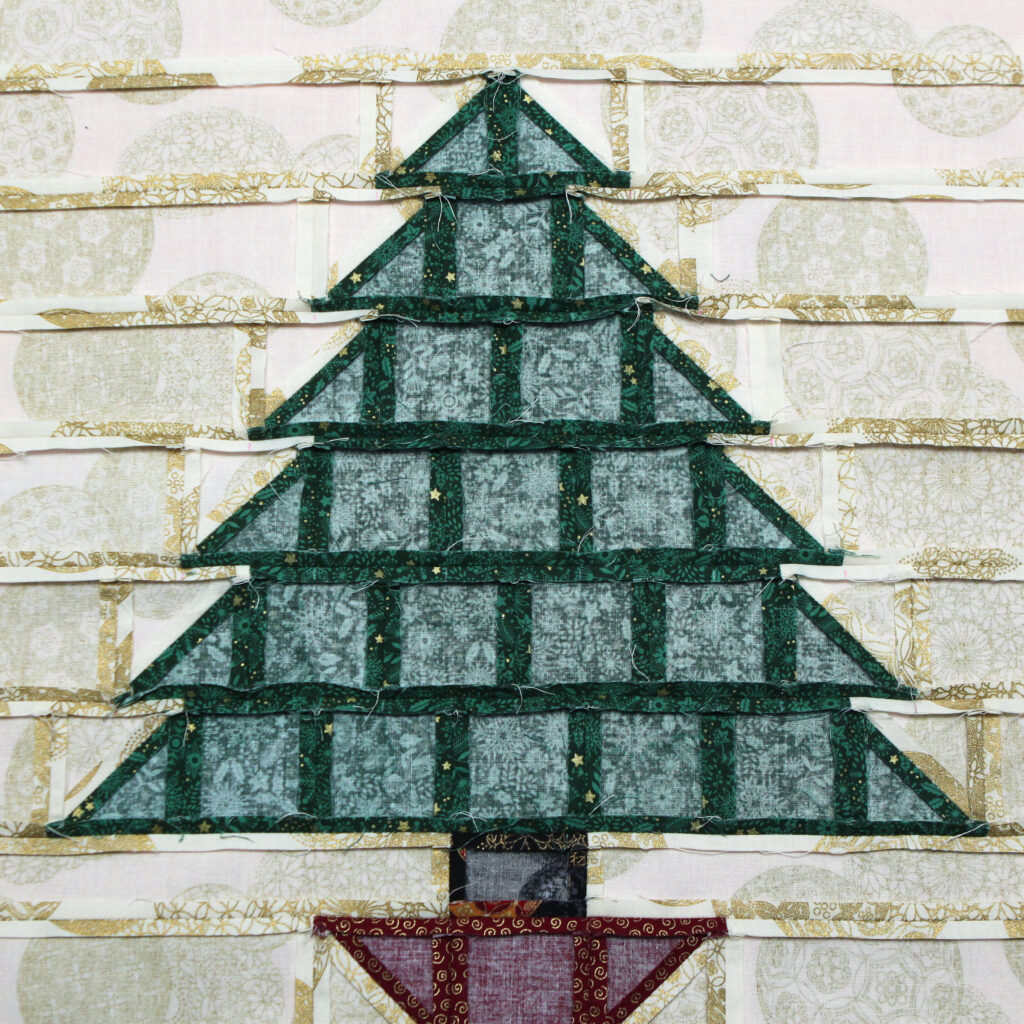
Continue piecing your rows together and pressing seams open until you have a finished piece that looks like this:
and here is the back with all the mis-matched seams:
Layering Up and Quilting
Once the tree is all sewn together, layer up with wadding and backing fabric (optional if making a cushion) and quilt all three layers.
A Layering Up and Quilting Tutorial can be found on my YouTube Channel.
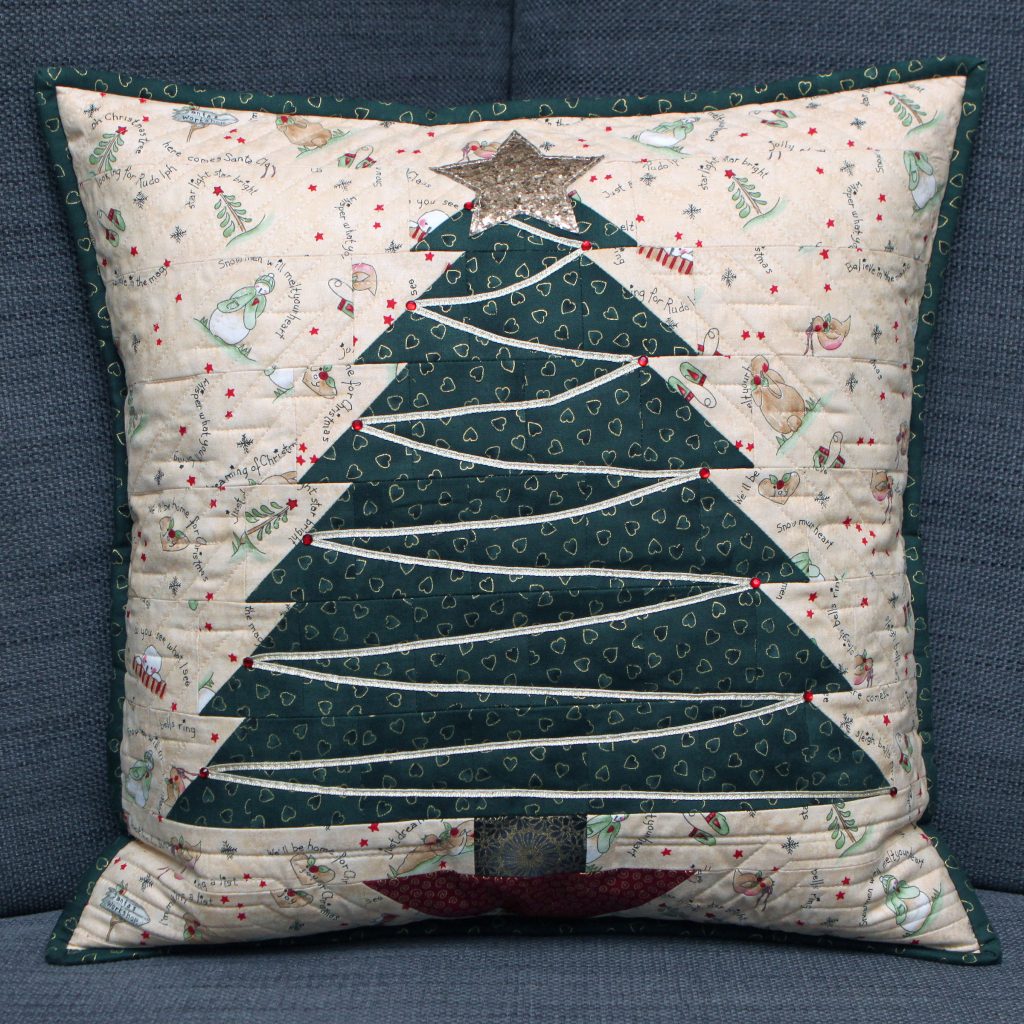
Decorating the Tree
These steps are optional! How you decorate (or don’t decorate) your tree is entirely up to you:
- Pin the ribbon into position on the tree and sew into place
- Position your star at the top of the tree and sew into place too
Preparing the Binding
- Fold all pieces of binding fabric in half lengthways and press.
- You now have one long strip of fabric which is 1.25” high by 82” wide, which you will use to bind your cushion.
- The shorter piece of binding will be used to bind the opening of your cushion backs.
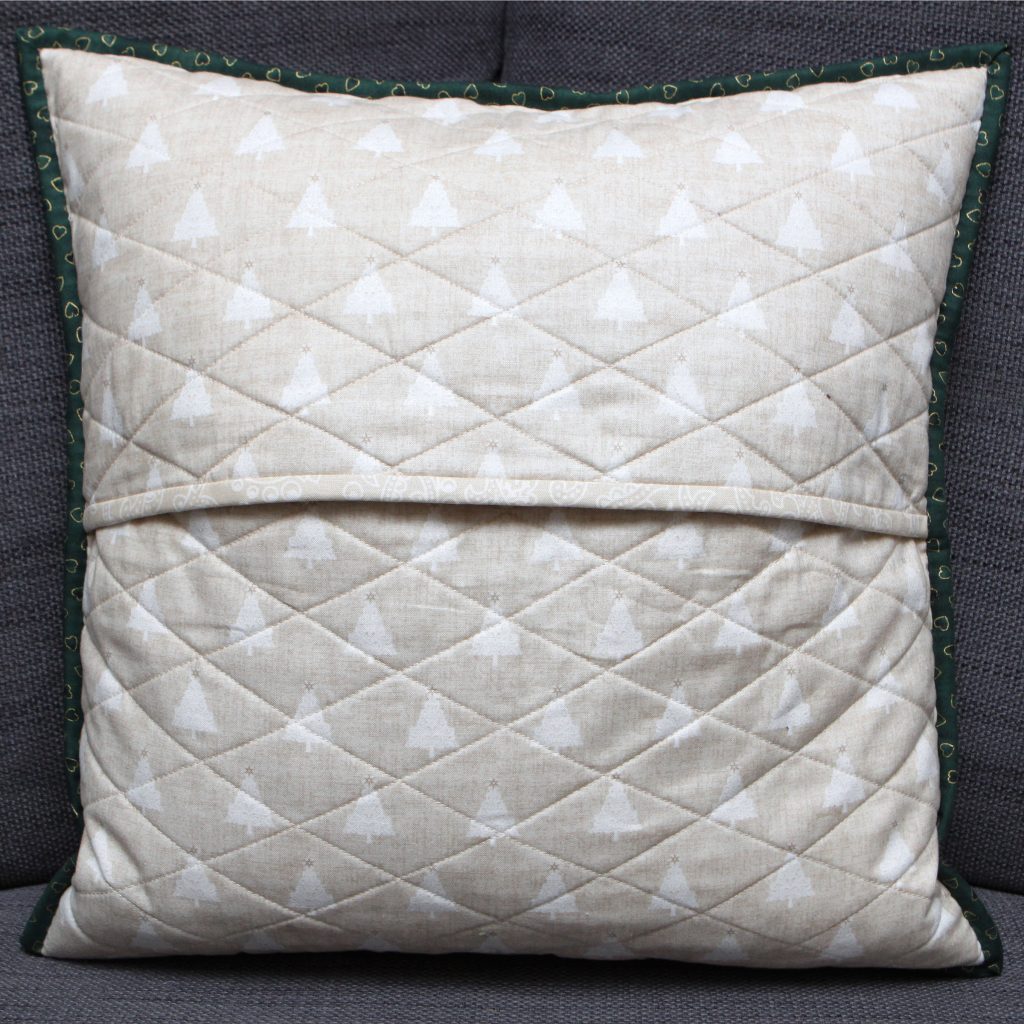
Making a Cushion
- Trim quilted cushion front to 18.5” square (to fit 18” cushion pad with 3/8“ seam allowance all around)
- Layer up and quilt cushion backs and trim to 18.5” wide. Bind either top or bottom of each piece
- Pin cushion back pieces to cushion front (WS together), making sure that at the back the top piece over laps the bottom piece
- Bind the outside edge of your cushion. A Binding Tutorial can be found on my YouTube Channel
Adding Baubles to the Tree
Add diamantes or buttons at the end after all your quilting and binding is finished.